Thursday, April 9, 2009

Final Project: 3 Views

Description
For our final project we will create a series of images of a single subject. This set of images will be a way to explore this subject from a number of different perspectives, angles, or ideas. The subject is up to you- but it should be very specific. “Sunsets” is not a good theme. Instead, try think about where/when you experienced this subject in a personal or unusual way. Therefore, “cloudscapes that I experienced while driving cross country” might be a better theme.

Once you have chosen the subject, consider the various ways that you can describe it. For example, Claude Monet painted the front of the Rouen Cathedral over and over, each time changing the colors depending on the time of day he observed. He did the same with haystacks. The end result is that his paintings radiate color and light, instead showing a touristy view of the cathedral. Another option would be to describe the same subject from a number of different perspectives. This might involve a micro/macro view or simple changing the angle of the view. You might describe the same subject at in different lighting conditions, settings, or versions.

As before, any and all watercolor materials and techniques are open to you. Your style should suit the subject and your abilities as an artist (you can paint loose or tight, naturalistic or abstract). As you complete these 3 images, you should be able to discuss how and why these 3 images describe something special about this subject that we would not understand from a single image (ie. Monet’s Cathedral). These images should be 9 x 12 inches or larger and will be due on April 28.

Materials
Watercolor paints, paper, brushes, pencil, eraser, water, palette, cup, paper towels or rags.
Other techniques may use collage, pen and ink, etc.

Consider
Which subject do you find fascinating or compelling for watercolor painting? How can you describe it in an interesting, unusual, and/or personal way?
How can you create a series that describes different aspects, perspectives, or ideas of this subject?
How can you use watercolor to create three appealing images?
What is the overall effect of these different perspectives on our interpretation of the subject?

Part 1
Decide on the subject or several options for your subject. Bring source materials like sketches, photos, books, etc. Do not bring images on your phone or laptop. Be prepared to discuss why and how you chose your subject.
Due April 14

Part 2
Complete painting #1. Show 6 thumbnail sketches (2 x 2 inch drawings with composition, perspective, and value), from which you will choose the final 2 paintings.
Due April 21

Part 3
Complete paintings #1, 2, and 3. Be prepared to discuss your project with the class.
Due April 28

Look at
Claude Monet painted this series of the Rouen Cathedral where he focused on color and light.


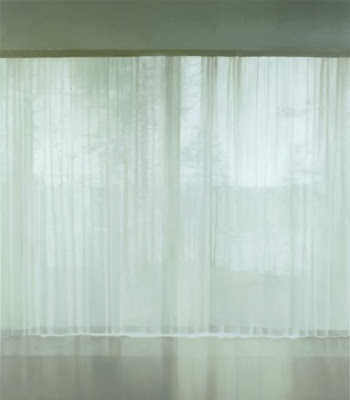
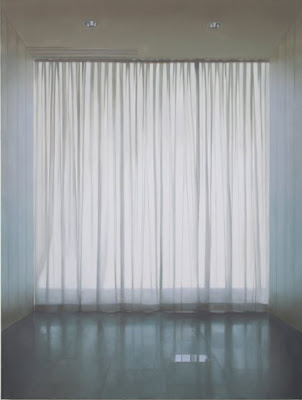
Paul Winstanley has focused on curains through which a soft light filters.
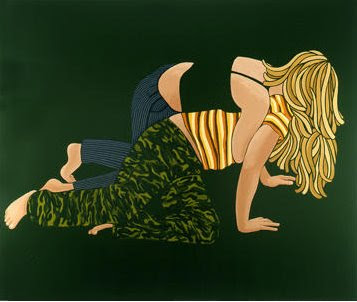
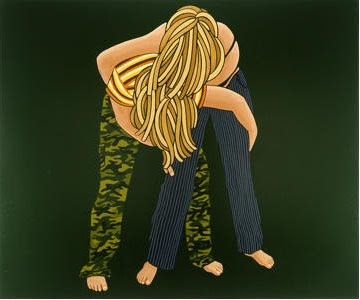
Amy Adler creates simple but curious paintings of 2 girls wrestling.

Tuesday, February 3, 2009

Washes

A wash is a thin layer of watercolor paint, applied with a saturated brush over a broad area. It can be applied to damp or dry paper. This wash is very flexible when it is wet- and can be altered or even added to with other colors. Once dry, it can serve as the foundation for the rest of your painting. For a detailed explanation of washes, see here.

Lets test the following types of washes together. You will need a separate sheet of paper divided into several sections.

Flat wash
A flat wash has consistent color and value throughout.
Prepare color or physical mix on your palette by dampening the paint and using a separate mixing brush as necessary. Once you begin a wash, it will be hard to stop so have everything ready beforehand. You may wish to incline your board slightly so the wash runs downward.
Begin with a big saturated brush at the top of your designated area and apply the color in broad overlapping strokes. Each stroke should fall slightly below the previous one (do not go back into an area once its painted). Pick up the paint with each stroke and keep it moving either from left to right or both directions.
Once a wash is done, leave it alone.

Graded wash
A graded wash increases or decreases in saturation and value.
Mix a light, middle, and dark tone of your color in different trays.
Apply the paint in the same fashion as above- gradually transitioning from dark to light down the sheet (this may require turning the paper upside down if a light/dark wash is required). For a more even wash, you may dampen your paper before you apply the wash- and then use slightly more paint to compensate for the desaturation. Keep the wash moving, and again don?t touch it while it?s drying.

Graded two-color wash
A smooth blending between two colors in a large area is a useful tool in your painting.
Premix your two principle colors as well as a transition color and follow the previous methods of application. An angled board is especially useful here.


Variegated wash
A variegated wash is a loose wet wash where colors intermingle on the painting. Premix your desired colors in separate areas of the palette. Dampen the entire paper and paint one area up to the boundary of the next. Allow the colors to diffuse into one another. The wetter the paper, the more there will be blending. The drier the paper, the more distinct brushmarks and colors will appear.

Other applications
Although we can think of a wash as a technique for broad application, this is really the tool we use when painting smaller sections as well. Consider any area where we increase the saturation and value of a color- it's basically a wash on a smaller scale.


Wet-on-wet Painting
Up to now, we have thought about applying color in sections in terms of distinct layers. Whether applying a glaze or a flat wash (the same technique on different scales), we use one color to cover an area. A variegated wash on the other hand does something different by allowing colors to intermingle.

Wet-on-wet is a means of applying color into a wet area. Depending on the degree of wetness of the paper and the saturation of color, this effect will produce varying results. Try the following experiment.

Wet a long section of paper and then apply paint dabs with a saturated color after different amounts of time.
Immediate
20 seconds
40 seconds
60 seconds.

With wet paper, the paint spreads quickly and diffusely. With slightly damp paper, the paint spreads more slowly. Even when the paper is still barely wet, we can use this technique to drop in color with soft edges.Another way to use this technique is in conjunction with a flat wash (instead of wetting the paper with clean water).

Also, you may apply several different colors mixed previously on your palette, which will then combine on your paper. It's another form of the variegated wash.

As always, do not go back in an area once its drying to make corrections. In general we can apply the rule that we always work from light to dark (so that I cannot apply a diluted wash of light blue to a drying section of dark green).

Color Mixing

In watercolor, there are two basic approaches to mixing color- either by combining two or more pigments on your palette or by laying one color on top of another on the paper. In the first method- what we call physical mixing, we might mix cadmium red with cadium yellow to create an orange hue. In the second method- what we might call optical mixing or glazing, we would paint a light red wash, wait for it to dry and then apply a yellow wash. Try both methods- since each one has useful applications.

physical mixing- colors mixed on the palette, or on paper simultaneously to create desired color.

optical mix or glazing*- colors are mixed in successive transparent layers, with drying time in between. The color on top affects the colors on the bottom. This creates the effect of mixed color as in colored cellophane.
*See this link for a more in-depth explanation of optical mixing/glazing.

Set-up/Procedure


Following certain procedures regarding the development of a watercolor painting gives us greater control and expectation of its outcome. Consider these guidelines as you build this painting, and subsequent ones.

1. Set-up your materials so that you have paints squeezed out onto your palette, brushes accessible, 2 containers for water- 1 clean and 1 for mixing, paper towels, and any other tools you may need. You won’t want to get-up in the middle of a wash if things aren’t going well.
2. Begin with a light pencil sketch, done with H pencil or lighter. Lines should be just visible. Use a clean eraser to remove any excess lines before you begin (not after). You will be establishing the shapes and edges (not creating value or shadows). Spend as much time as you need to create a good sketch (it will pay off later).
3. Start to apply color, filling in one section at a time. Apply the palest washes first. Remember that you will be creating lighter colors by using less paint and more water- or simply the white of the paper (and not white paint). Dark colors, by contrast, have a higher concentration of pigment, often layered.
4. Let each layer dry before you begin to apply the next.
5. Generally, you should be working light to dark- so that you establish all of the tones in a light fashion at the start of the painting, and gradually work in darks.
6. Work the painting up together, starting with larger shapes and tones (using larger brushes), and saving small details, highlights, and accents for last (done w/small brushes).
7. The colors and tones in the painting will dry 20% lighter than how you applied them. Use this knowledge to your advantage and don’t be afraid to put down bright and deep colors.
8. In the background, try using a diluted wash for broad light areas, slightly darker for surfaces like the tabletop.

** more on basic procedure

Monday, January 19, 2009

Technique Glossary


Once you have your supplies, use this first week to explore the different brushes, paint, and water effects possible in watercolor. You may use any brush, color, water combination- or other related materials- to create a glossary of 24 unique watercolor effects. This glossary should be done in your watercolor pad (on watercolor paper). The effects should be displayed in a grid with each box being roughly 2-3 inches square. Make several notes below each effect to describe the materials or procedure.

Materials
Paper, paint, water, brushes, and any other materials- including salt, alcohol, tea, coffee, razors, wax, etc.

Due January 27

Calendar

Week 1
January 20
Introduction Course objectives
Student survey
Discuss Technique & Concept
Watercolor Themes, Artists, History
HW: 24 Techniques/Effects

Week 2
January 27 Color Mixing/Observed Object
Techniques: optical, & physical color mixing, hard and soft edges
Look at: Albrect Durer, Janet Fish, Joseph Raffael, Ralph Goings
HW: Observed Object, Color Chart

Week 3
February 3 Weather and Light
Technical skills: washes- flat, varieted, two color, wet in wet
Look at: JMW Turner, Trevor Chamberlain
HW: Weather and Light

Week 4
February 10 Dark Matter
Techniques: Negative Shapes, Lifting Out, and Resist construction
Look at: Gregory Gillespie, Carolyn Brady, Don Eddy
HW: Dark Matter

Week 5
February 17 Brushwork
Techniques: brush grip, direction, shape, drybrush
Examining Style
HW: Contrasting Style Paintings


Week 6
February 24 Experimental Technique
Techniques: wet-in-wet, blooms, slatter, adding materials, scratching out
Look at: John Marin, Arthur Dove, Alan Magee
HW: Storybook ideas

February 26 EXTRA class meeting required
Worcester Art Museum “Watercolor- Bodycolor”, 6:30 – 7:30 pm

Week 7
March 3 Midterm Break

Week 8
March 10 Figure Painting

Week 9
March 17 Children’s storybook illustrations
Look at: Jeff Scher “You won’t remember this”
HW: Storybook illustrations cont.

Week 10
March 24 Guest Artist: Irena Roman
Children’s storybook illustrations
HW: Project ideas

Week 11
March 31 Independent work

Week 12
April 7 Independent work

Week 13
April 14 Independent work

Week 14
April 21 Independent work

April 23 Senior Art Studio Thesis Exhibition
Traina Center, 5-7 pm

Week 15
April 28 Final Critique

Welcome

Welcome to Painting II. I look forward to working with all of you this semester on a number of interesting projects. I'll be using this blog frequently- so check back often.

John James Audubon
Tim Gardner
John Singer Sargent